🎉 Introduction
Calling all Oreo lovers! These Oreo No-Bake Cheesecake Cups are everything you want in a dessert: creamy, dreamy, crunchy, and fast. With just 5 simple ingredients, no oven required, and minimal prep, this is the ultimate sweet fix for busy days, last-minute guests, or midnight cravings.
Whether you’re prepping for a party, serving up individual desserts at a baby shower, or treating yourself to a cozy night in, these cheesecake cups bring all the decadent flavor of Oreo cheesecake — without the hassle.
They’re sweet, rich, perfectly portioned, and topped with everyone’s favorite cookie. No fancy equipment, no water bath, no baking — just chill, scoop, and enjoy.
🧰 Equipment Needed
- Medium mixing bowl
- Hand mixer or stand mixer
- Rubber spatula
- Measuring cups & spoons
- Small cups or ramekins (6–8)
- Ziplock bag & rolling pin (or food processor)
- Spoon or piping bag (optional for neat layers)
🎯 No-bake = no-stress. Just mix, chill, and enjoy every creamy bite!
🛒 Ingredients
🖤 For the Cheesecake Cups
- 1 (8 oz) block cream cheese, softened
- 2/3 cup powdered sugar
- 1 tsp vanilla extract
- 1 (8 oz) tub Cool Whip or whipped topping, thawed
- 24 Oreo cookies, crushed (reserve a few whole for garnish)
👩🍳 Directions
Step 1: Crush the Oreos
- Place 20 Oreo cookies in a zip-top bag.
- Crush them with a rolling pin until they become fine crumbs (or use a food processor).
- Set aside.
🧁 For a layered look, crush more finely for the base, and save chunky bits for topping!
Step 2: Make the Cheesecake Filling
- In a mixing bowl, add softened cream cheese. Beat until smooth.
- Add powdered sugar and vanilla. Beat again until creamy and fluffy.
- Fold in the Cool Whip gently with a spatula until fully combined.
⚠️ Don’t overmix after adding whipped topping — it keeps the texture light and airy.
Step 3: Assemble the Cups
- Spoon a layer of crushed Oreos into the bottom of each cup (about 2 tbsp).
- Add a generous scoop of cheesecake filling.
- Repeat with another layer of Oreo crumbs, then top with more filling.
- Finish with crushed Oreos or a whole cookie on top.
🎂 Want it fancier? Use a piping bag for swirled filling layers.
Step 4: Chill & Serve
- Cover and refrigerate for at least 1 hour, or up to 24 hours for firmer cups.
- Serve cold with extra cookies or chocolate drizzle if desired.
🍽️ Servings & Timing
- Yield: 6–8 cheesecake cups
- Prep Time: 10 minutes
- Chill Time: 1 hour
- Total Time: ~1 hour 10 minutes
Perfect for parties, potlucks, or small-batch dessert cravings.
🧊 Storage & Reheating
Refrigerator
- Store covered in the fridge for 3–4 days.
Freezer
- Freeze for up to 1 month. Thaw in the fridge before serving.
🍦 Frozen cheesecake cups also make a delicious chilled treat in summer!
🥄 Variations
- 🍓 Strawberry Oreo Cups – Add a layer of fresh strawberries or swirl in jam.
- 🍫 Chocolate Lover’s Dream – Mix cocoa into the filling and top with ganache.
- 🥥 Coconut Oreo Cups – Add shredded coconut and use Golden Oreos.
- 🎂 Birthday Cake Style – Add sprinkles and a splash of almond extract.
- 🍫 Minty Twist – Use mint Oreos and add a drop of peppermint extract.
❓ 10 FAQs
1. Can I use homemade whipped cream instead of Cool Whip?
Yes! Use about 1½ cups of fresh whipped cream. Just make sure it’s firm and stable.
2. What’s the best cream cheese to use?
Use full-fat block cream cheese for the creamiest texture. Avoid whipped or spreadable tubs.
3. Can I use other cookie brands instead of Oreos?
Absolutely — any chocolate sandwich cookie will work.
4. Are these freezer-friendly?
Yes! Just thaw in the fridge for a few hours before eating.
5. Can I make these in a pie crust instead?
Definitely — just press the Oreo crumbs into a pie dish for a no-bake cheesecake pie.
6. Can I make them in a muffin tin?
Yes! Line with cupcake liners, assemble as usual, and chill.
7. Are these overly sweet?
They’re rich but balanced — use less powdered sugar if you prefer.
8. Can I make them keto or sugar-free?
Use sugar-free cookies and powdered sweetener, and a keto whipped topping.
9. Can I add chocolate chips or chunks?
Yes — stir mini chips into the filling for extra texture.
10. How far in advance can I make them?
They’re perfect made 1–2 days ahead. Just keep chilled and covered.
🏁 Conclusion
These Oreo No-Bake Cheesecake Cups are a creamy, crunchy, indulgent dessert dream made with just 5 ingredients. No oven, no stress — just layers of rich cheesecake and irresistible Oreo flavor in every spoonful.
Whether you’re making them for a celebration or satisfying a personal sweet tooth, these cheesecake cups will steal the show. Once you try them, you’ll want to keep this recipe on repeat.
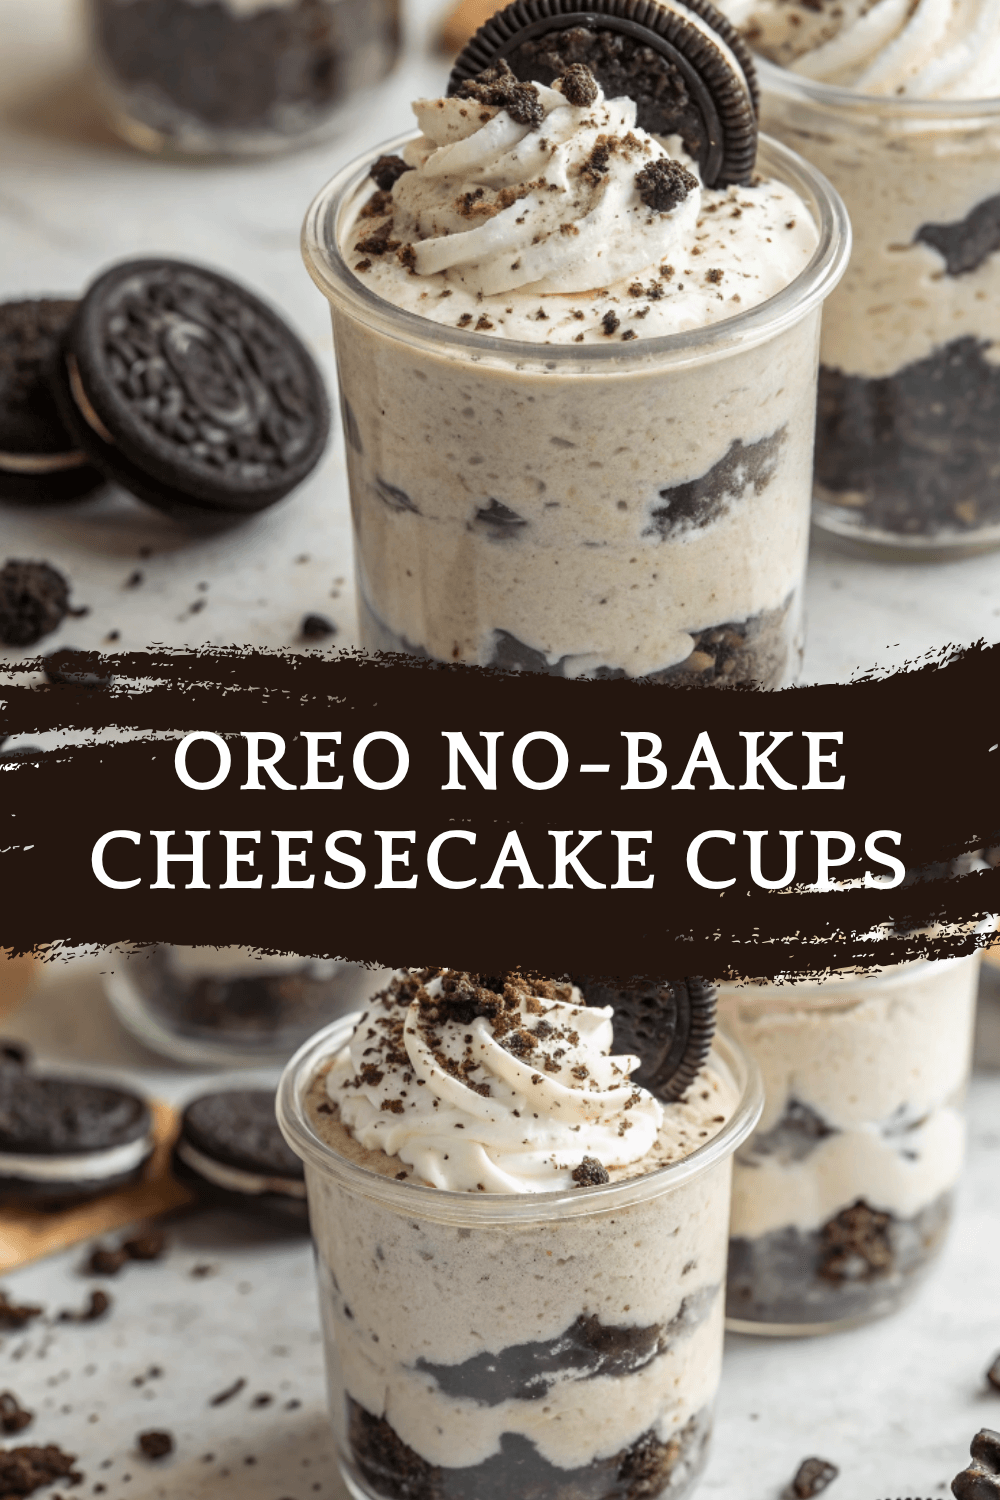

Oreo No-Bake Cheesecake Cups – Creamy, Crunchy, and Ready in Minutes!
Ingredients
Equipment
Method
- Place 20 Oreo cookies in a zip-top bag.
- Crush them with a rolling pin until they become fine crumbs (or use a food processor).
- Set aside.
- In a mixing bowl, add softened cream cheese. Beat until smooth.
- Add powdered sugar and vanilla. Beat again until creamy and fluffy.
- Fold in the Cool Whip gently with a spatula until fully combined.
- Spoon a layer of crushed Oreos into the bottom of each cup (about 2 tbsp).
- Add a generous scoop of cheesecake filling.
- Repeat with another layer of Oreo crumbs, then top with more filling.
- Finish with crushed Oreos or a whole cookie on top.
- Cover and refrigerate for at least 1 hour, or up to 24 hours for firmer cups.
- Serve cold with extra cookies or chocolate drizzle if desired.
Notes
Store covered in the fridge for 3–4 days. Freezer
Freeze for up to 1 month. Thaw in the fridge before serving. 🍦 Frozen cheesecake cups also make a delicious chilled treat in summer! 🥄 Variations 🍓 Strawberry Oreo Cups – Add a layer of fresh strawberries or swirl in jam. 🍫 Chocolate Lover’s Dream – Mix cocoa into the filling and top with ganache. 🥥 Coconut Oreo Cups – Add shredded coconut and use Golden Oreos. 🎂 Birthday Cake Style – Add sprinkles and a splash of almond extract. 🍫 Minty Twist – Use mint Oreos and add a drop of peppermint extract. ❓ 10 FAQs 1. Can I use homemade whipped cream instead of Cool Whip?
Yes! Use about 1½ cups of fresh whipped cream. Just make sure it’s firm and stable. 2. What’s the best cream cheese to use?
Use full-fat block cream cheese for the creamiest texture. Avoid whipped or spreadable tubs. 3. Can I use other cookie brands instead of Oreos?
Absolutely — any chocolate sandwich cookie will work. 4. Are these freezer-friendly?
Yes! Just thaw in the fridge for a few hours before eating. 5. Can I make these in a pie crust instead?
Definitely — just press the Oreo crumbs into a pie dish for a no-bake cheesecake pie. 6. Can I make them in a muffin tin?
Yes! Line with cupcake liners, assemble as usual, and chill. 7. Are these overly sweet?
They’re rich but balanced — use less powdered sugar if you prefer. 8. Can I make them keto or sugar-free?
Use sugar-free cookies and powdered sweetener, and a keto whipped topping. 9. Can I add chocolate chips or chunks?
Yes — stir mini chips into the filling for extra texture. 10. How far in advance can I make them?
They’re perfect made 1–2 days ahead. Just keep chilled and covered. 🏁 Conclusion These Oreo No-Bake Cheesecake Cups are a creamy, crunchy, indulgent dessert dream made with just 5 ingredients. No oven, no stress — just layers of rich cheesecake and irresistible Oreo flavor in every spoonful. Whether you’re making them for a celebration or satisfying a personal sweet tooth, these cheesecake cups will steal the show. Once you try them, you’ll want to keep this recipe on repeat.




Leave a Reply